
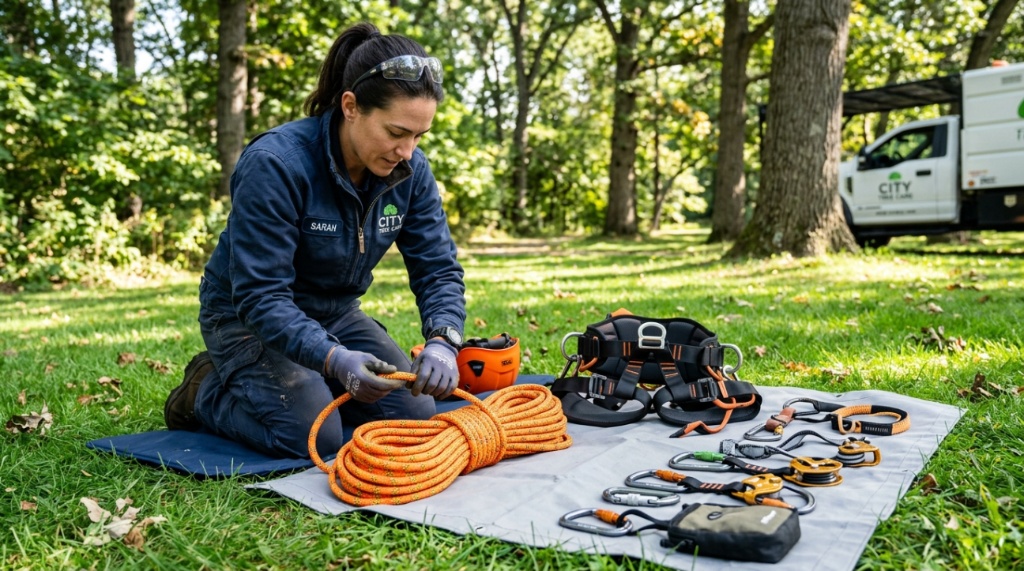
You’ve priced out a professional-grade climbing line and felt your stomach drop. Between the rope, the friction saver, the carabiners, and the harness, the total can easily exceed your monthly gear allowance. But here’s the truth: you don’t need to spend a fortune to work safely. The real challenge is separating genuine value from dangerously cheap knock-offs. This guide will show you exactly how to assemble or buy safe arborist rope kits under budget without compromising your life on the line. Let’s cut through the marketing noise and get you climbing with confidence—without emptying your bank account.
What Defines a Safe Arborist Rope Kit in the First Place?
A safe kit is more than just a rope. It’s a system engineered for work positioning, fall arrest, and rescue. The core components must meet specific strength standards, be compatible with each other, and show no signs of hidden damage. Skimping on one element compromises the entire system.
Core Components You Cannot Skip
Every kit needs a climbing line, a hitch cord or mechanical device, a saddle, and connection hardware. Avoid kits that replace these with non-rated accessories. A “bargain” kit that uses bungee cords or hardware-store carabiners is a death trap, not a deal.
Breaking Strength vs. Working Load: The Key Difference
Most safety standards require a minimum breaking strength (MBS) of around 5,400 pounds for climbing lines. The working load, however, is always much lower—usually around 300 to 400 pounds. Always check the MBS label, not just the price tag. A cheap rope with a low MBS is not a budget win; it’s a risk.
Why Compliance Labels Matter More Than Brand Names
Look for ANSI Z133 or CE certification marks. These labels prove the gear was tested by a third party. Some budget brands skip this step to cut costs. If you don’t see a certification mark, move on immediately. Your life is not worth the savings.
Why Do Budget Arborist Kits Get Such a Bad Reputation?
The bad reputation comes from cheap kits, not affordable kits. A true budget kit focuses on essential functionality and drops luxury features. A poor kit uses low-grade materials and poor stitching. Understanding this difference helps you spot diamonds in the rough.
The Hidden Dangers of Ultra-Cheap Ropes
Low-cost ropes often use less UV-resistant fibers or have fewer carrier strands. This leads to rapid wear, increased stretch under load, and premature failure. You might save $50 today, but you risk a much higher cost later. Always touch and feel the rope prior to purchasing if possible,Before tackling large-scale tree trimming or ground clearing, homeowners often wonder what size gas chainsaw do you really need for a small property, making it essential to choose the right power equipment alongside safe climbing gear.
Where Brands Cut Corners Without Cutting Safety
Reputable budget brands save money by using simpler packaging, offering fewer color options, or shipping without a fancy carry bag. They do not reduce the number of core strands or lower the quality of the splice. Look for these cost-saving indicators as positive signs.
When “Cheap” Becomes a Legal Liability
If you are a professional arborist, using uncertified gear can void your insurance and violate OSHA regulations. A single fine or an accident will cost far more than the money you saved. In this industry, “budget” must always mean “certified and affordable,” never “uncertified.”
How to Assess Rope Quality Without a Degree in Textiles?
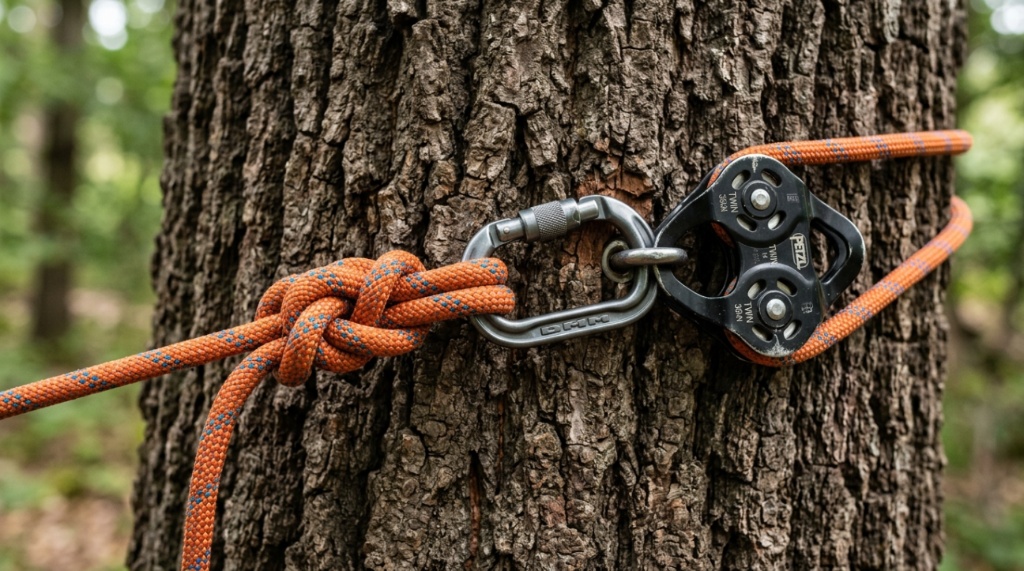
You don’t need to be a materials scientist to judge a rope. You just need to know a few tactile and visual tricks. Press the rope between your fingers. A quality arborist line will feel firm but compressible, not spongy. Look at the weave—it should be tight and uniform.
The Bend Test for Flexibility and Core Integrity
Bend the rope sharply in half. If you see any flat spots or feel a “crunchy” texture, the core might be damaged or of low quality. A healthy rope springs back immediately. Try this test on three different brands next time you’re at a supply store.
Reading the Label: Fiber Types Explained Simply
Most modern arborist ropes use nylon, polyester, or Technora®. Nylon absorbs energy well but is heavy. Polyester is lighter and stronger but less elastic. Technora® adds heat resistance. A budget kit usually opts for a 100% polyester line, which is a solid, safe choice for most tree work.
Spotting a Poorly Spliced Eye (The #1 Failure Point)
Inspect the eye splice at the end of the rope. The splice should be long (at least several inches), smooth, and show no loose strands. A cheap, short splice can pull apart under load. If the splice looks like a simple knot, it is not a splice—it’s a hazard.
Which Components Are Non-Negotiable in a Low-Cost Kit?
Even on a strict budget, four items must be top-tier: the rope, the carabiner, the hitch cord, and the friction saver. These are the primary load-bearing elements. You can save money on the gear bag or the extra accessories, but never on these four.
Selecting a Safe, Budget-Friendly Carabiner
Look for an auto-locking ‘biner with a minimum strength rating of 23 kN (kilonewtons). Skip the compact size if it costs more. A standard pear-shaped HMS carabiner is affordable and works perfectly with Blake’s hitch systems.
Why a Cheap Friction Saver Can Destroy Your Rope
Savers protect your rope from bark and debris. A low-quality saver might have rough edges or sharp seams that cut into the rope’s jacket. Run a cotton ball over the metal. If the cotton snags, the saver will snag your rope—return it.
Hitch Cords: The Right Diameter Makes the System Work
The hitch cord must be one to two millimeters smaller in diameter than the main line for a proper grip. A kit that ships with a cord that is too large or too thick will not grip your rope, leading to a drop. This is a frequent issue in ultra-budget kits.
How to Compare Different Affordable Kits Like a Pro?
Create a simple scoring system before you look at any product. Allocate points for safety certification (40%), component quality (30%), customer reviews (20%), and price (10%). This ensures you aren’t swayed by a flashy discount code or a nice looking picture.
Creating a Simple Comparison Matrix
Use a spreadsheet or paper to compare three kits side-by-side. List the rope length, fiber type, splice style, carabiner strength, and hitch cord length. If a product page lacks this info, ask the seller directly. A transparent seller is usually a trustworthy one.
Reading Reviews for Safety Red Flags, Not Just Complaints
Look for keywords like “spliced pulled through,” “rope frayed after one climb,” or “carabiner cross-threaded.” These are safety issues, not minor gripes. If 5% of reviews mention a structural problem, assume the real defect rate is higher.
Weight vs. Strength: The Budget Trade-Off
Cheaper ropes often use heavier fiber constructions to achieve the same strength. This means you will carry extra weight up the tree. If you are a working arborist, this extra pound will exhaust you. For a homeowner, it may not matter. Consider your specific use case.
Cost per Climb: A Smarter Way to Calculate Value
Divide the kit’s price by the expected lifespan. A $200 kit that lasts 200 climbs costs $1 per climb. A $100 kit that lasts 50 climbs costs $2 per climb. The “expensive” kit is actually the budget one. Always calculate cost per use, not just the upfront price.
Where Can You Find Legitimate Deals on Certified Gear?
Skip Amazon marketplace sellers unless they are authorized dealers. Look for online arb-supply stores with closeout sections, or check local arborist forums for used gear that has never been climbed on. You can also find deals at tree care trade shows.
Using Professional Retailers’ Clearance Sections
Major suppliers like Bartlett Arborist Supply or WesSpur often have a “sale” section with overstock or discontinued colors. The safety rating is identical to the new version; only the packaging differs. This is the best way to get high-end gear at a budget price.
Working With Your Local Arborgroup for Bulk Deals
If you are purchasing for a small crew, contact the supplier directly and ask for a “bid pack” or “crew discount.” Often, you can negotiate 10-15% off the retail price if you buy 3 or more kits at once. This is a hidden industry secret.
Learning the Shipping Cost Trick That Saves Hundreds
Some budget kits dazzle you with a low price, then hit you with a $40 shipping fee. Always look at the total landed cost. Many brands now offer free shipping over a particular threshold. Add a spare throw bag to your cart to cross that line, not an expensive rope.
When Should You Absolutely Avoid a Budget Kit?
If you are doing heavy production removals, climbing on spar with difficult angles, or using footlock techniques for hours, avoid ultra-budget kits. These scenarios increase wear and require higher stiffness levels. A budget line might fail sooner than a professional one.
Identifying High-Risk Work Scenarios
Work near power lines, heavy deadwood, or in extreme heat demands the highest quality rope technology. The cost of a premium line is trivial compared to the cost of a catastrophic incident. For these jobs, don’t compromise longevity for price.
The Recency of Your Skills: Are You a Beginner?
Beginners often make sharp edges, causing high friction on the rope. A budget rope with a thinner jacket may chafe faster. If you are still mastering your friction hitch technique, opt for a slightly thicker rope—it will last longer under your learning curve.
Personal Risk Tolerance and Insurance Requirements
Check your business insurance policy. Many insurers require proof of specific rope certifications. If you buy a budget kit that doesn’t list the ANSI standard on the label, your insurance claim might be denied. Always check your policy document first.
Can You Build a Custom Kit for Less Than a Pre-Assembled One?
Yes, if you know exactly what to buy. A pre-assembled kit is convenient, but it often includes a harness that doesn’t fit well. Building your own allows you to pick a harness that fits you perfectly and a rope of your preferred length. The catch is that it takes extra time to research.
Step-by-Step: Building Your Own Budget Kit
Start with a 60-meter (200ft) polyester rope. a 24-inch hitch cord. one rated HMS carabiner. a friction saver. Finally, choose an entry-level harness. This combo can often be found for $250–$300 if sourced smartly. Just ensure all pieces are compatible.
Utilizing Free Resources to Check Compatibility
Use online forums like Arboristsite.com to ask if your chosen rope diameter works with a particular hitch cord. Users are often happy to share their experiences. This prevents you from buying incompatible parts that won’t work together.
The Hidden Costs of DIY: Time and Mistakes
Building your own kit means you might buy the wrong carabiner size first, or a rope too stiff for your liking. These mistakes cost money in return shipping. If you are new, a pre-assembled kit is often less stressful. If you are experienced, DIY gives you needed flexibility.
How to Maintain a Budget Kit to Extend Its Life?
Your biggest ally in budget gear is maintenance. A $150 rope that lasts 3 years is better than a $300 rope that lasts 1 year due to neglect. Rinse your rope after climbing to remove abrasive dust and sap. Dry it flat away from UV light.
Weekly Inspection Checklist for Hidden Damage
Run your hand along the rope, feeling for soft spots or lumps. Check the stitching on your harness for pulls. Inspect the carabiner gate for smooth closure. Clean the friction saver with a dry cloth. This simple checklist helps you spot failures in their early stages.
Proper Storage Techniques That Save Money
Coil your rope loosely, not in a tight bundle, to prevent kinks. Hang it in a cool, dry place away from sunlight and chemicals. The sun’s UV rays are the #1 killer of cheap ropes. A simple fabric storage bag is a worthy investment.
Knowing When to Retire a Budget Rope
Check for core exposure (when you can see white inner fibers), deep cuts, or melted spots. These are all terminal damage signs. Do not sew or tape a rope. Once compromised, its strength is permanently compromised. Retire your rope immediately.
What Do Expert Arborists Typically Recommend for Beginners?
Most experts agree that a 11.7mm to 12.7mm diameter polyester rope with a 24-strand construction is the best starting point for a beginner. It is stiff enough for climbing but flexible enough to tie friction hitches easily. The brand isn’t as critical as the construction.
Popular Rope Types Used in Affordable Kits
Common lines in budget kits include the Samson Ultra-Tech or Yale XTC Plus, but there are generic brands that mimic these designs. Look for terms like “24-strand polyester” or “single braid arborist line” rather than specific brand names to save money.
Actual Rope Diameter vs. “Feels Right” Diameter
Do not guess the diameter. Use a caliper to measure it. A rope that says 12.7mm might actually be 12.2mm. If it’s too thin, your hitch cord won’t grip. This is a common quality control issue with the cheapest unbranded kits.
The Value of Buying from a Specialized Arb Shop
A specialist shop will test their budget line differently than a general outdoor store. They understand the specific use-case of tree climbing. Even if it costs $10 more, the specialized knowledge and customer service are worth the premium.
Is Buying Used Arborist Gear a Smart Budget Move?
Sometimes, but only if you know how to inspect it. Rope that has never been loaded or climbed on can be an amazing deal. However, harnesses are harder to assess for internal damage. Never buy a used carabiner unless you visually inspect it for cracks. You can always find better deals on low-use safe arborist rope kits under budget from specialized suppliers online, which ensures fresh, certified gear.
Spotting a “Never Climbed” Rope You Can Trust
Check the ends. If the splice is pristine and the rope still has its manufacturer’s plastic wrap, it was likely never used. If it has dust or dog hair, it has been hanging in a garage. Ask for a photo of the core by cutting a tiny piece off—a seller with nothing to hide will comply.
High-Risk Used Items You Should Never Buy
Avoid used harnesses unless you can inspect every single stitch. Avoid used ascenders or mechanical devices, as spring tension can weaken over time. A used rope is sometimes okay, but a used friction hitch cord is almost always a bad idea because it wears into the main line.
Testing the Rope’s Elasticity Before You Pay
If you meet the seller, take a short length of rope and tie a knot. Pull it tight. If the rope feels harsh or doesn’t hold the knot well, walk away. The property of “knot holding” is critical for a safe climb. If it feels too slippery, it will not grip.
Frequently Asked Questions
What is the safest rope material for a budget kit?
Polyester is the safest and most forgiving material for budget kits. It resists UV degradation better than nylon and holds knots well. For most residential tree work, a 100% polyester double-braid rope provides excellent value without sacrificing core safety standards.
Can I use a dynamic climbing rope instead of an arborist rope?
No, do not use a dynamic climbing rope (used for rock climbing) for arborist work. Dynamic ropes stretch too much under load, which can cause you to bounce dangerously. Arborist ropes are static or semi-static, providing a stable working platform for cutting and positioning.
How long does a budget arborist rope typically last?
With proper care and infrequent use (once a month), a budget rope can last 2-3 years. For daily professional use, expect to retire a budget rope within 6-12 months. Always follow the manufacturer’s recommended retirement criteria over the calendar spacing.
Are all carabiners in budget kits rated for climbing?
Not always. Check the label for the symbol “CE” or “UIAA.” If the carabiner doesn’t have a kN rating printed on the gate, do not use it for climbing. Use it for carrying gear only. There is no substitute for a certified locking carabiner.
What is the minimum number of strands a safe rope should have?
Aim for at least 16 carrier strands to ensure good abrasion resistance. Many budget kits use 24 or 32 strands. A rope with fewer than 16 stands is usually too soft and will wear out quickly. More strands generally mean a stronger rope, but also a heftier price.
Can I save money by tying my own eye splices?
Yes, if you learn to do a proper locked Brummel splice. But if you have never done it before, do not attempt it for climbing. A poorly tied splice is a fatal flaw. Practice on scrap rope for several hours before risking your life.
Is a bigger diameter rope always safer?
No, bigger is not always better. A 13mm rope is harder to grip and heavier to carry. The ideal diameter for most balancing work is between 11.5mm and 13mm. Always match the rope diameter to your hitch cord for a consistent grip.
Conclusion
Finding a safe arborist rope kit under budget comes down to knowledge, not luck. You’ve learned how to inspect splices, measure rope stiffness, and check for compliance labels. You now know to spend your money on the four critical components—rope, carabiner, hitch cord, and friction saver—rather than paying a premium for a brand name. Remember to inspect your gear frequently and prioritize functionality over flash. Don’t let a low price tag trick you into neglecting your safety. Your life depends on that rope every time you climb. Now that you know what to look for, go compare your top two kits with a checklist in hand. Make the smart choice, not the cheap one.
Focus Keyphrase
Meta Description:
About Author

You may also like
-
National Dog Show 2026: Dates, Tickets, Schedule, Breeds, and Events
-
Bay Area Science Festival 2026: Best STEM Events and Family Activities
-
State Fair of Virginia 2026: Tickets, Rides and Attractions
-
Arizona State Fair 2026: Dates, Tickets, Concerts and Everything to Know
-
How to Pick Windproof Surf Ponchos for Cold Water Surfing